


The term “flat mite” or “false spider mite” is a name given to a group of nearly 300 species of pest mites in the family Tenuipalpidae. They are related to spider mites, and their bodies are flat, hence the nickname. The most common species of Tenuipalpidae on our cultivated houseplants are the Brevipalpus mites.
Like spider mites, flat mites feed on surface leaf tissue, but unlike spider mites, the areas of their feeding tend to scar up, and they don’t make any webbing. Because they are microscopic, this damage tends to be the first indication you may be dealing with flat mites, as well as plant growth that is slowed or otherwise stalled.
Historically, flat mites were mainly an issue in tropical areas, where they fed on banana, rubber, and coffee plants, as well as palms. However, as the plant market has exploded over the past few years and imports have increased, we are increasingly seeing flat mites on houseplants—primarily Hoya, which have the thick waxy leaves that flat mites love.
The Flat Mite Life Cycle
What Flat Mites Look Like
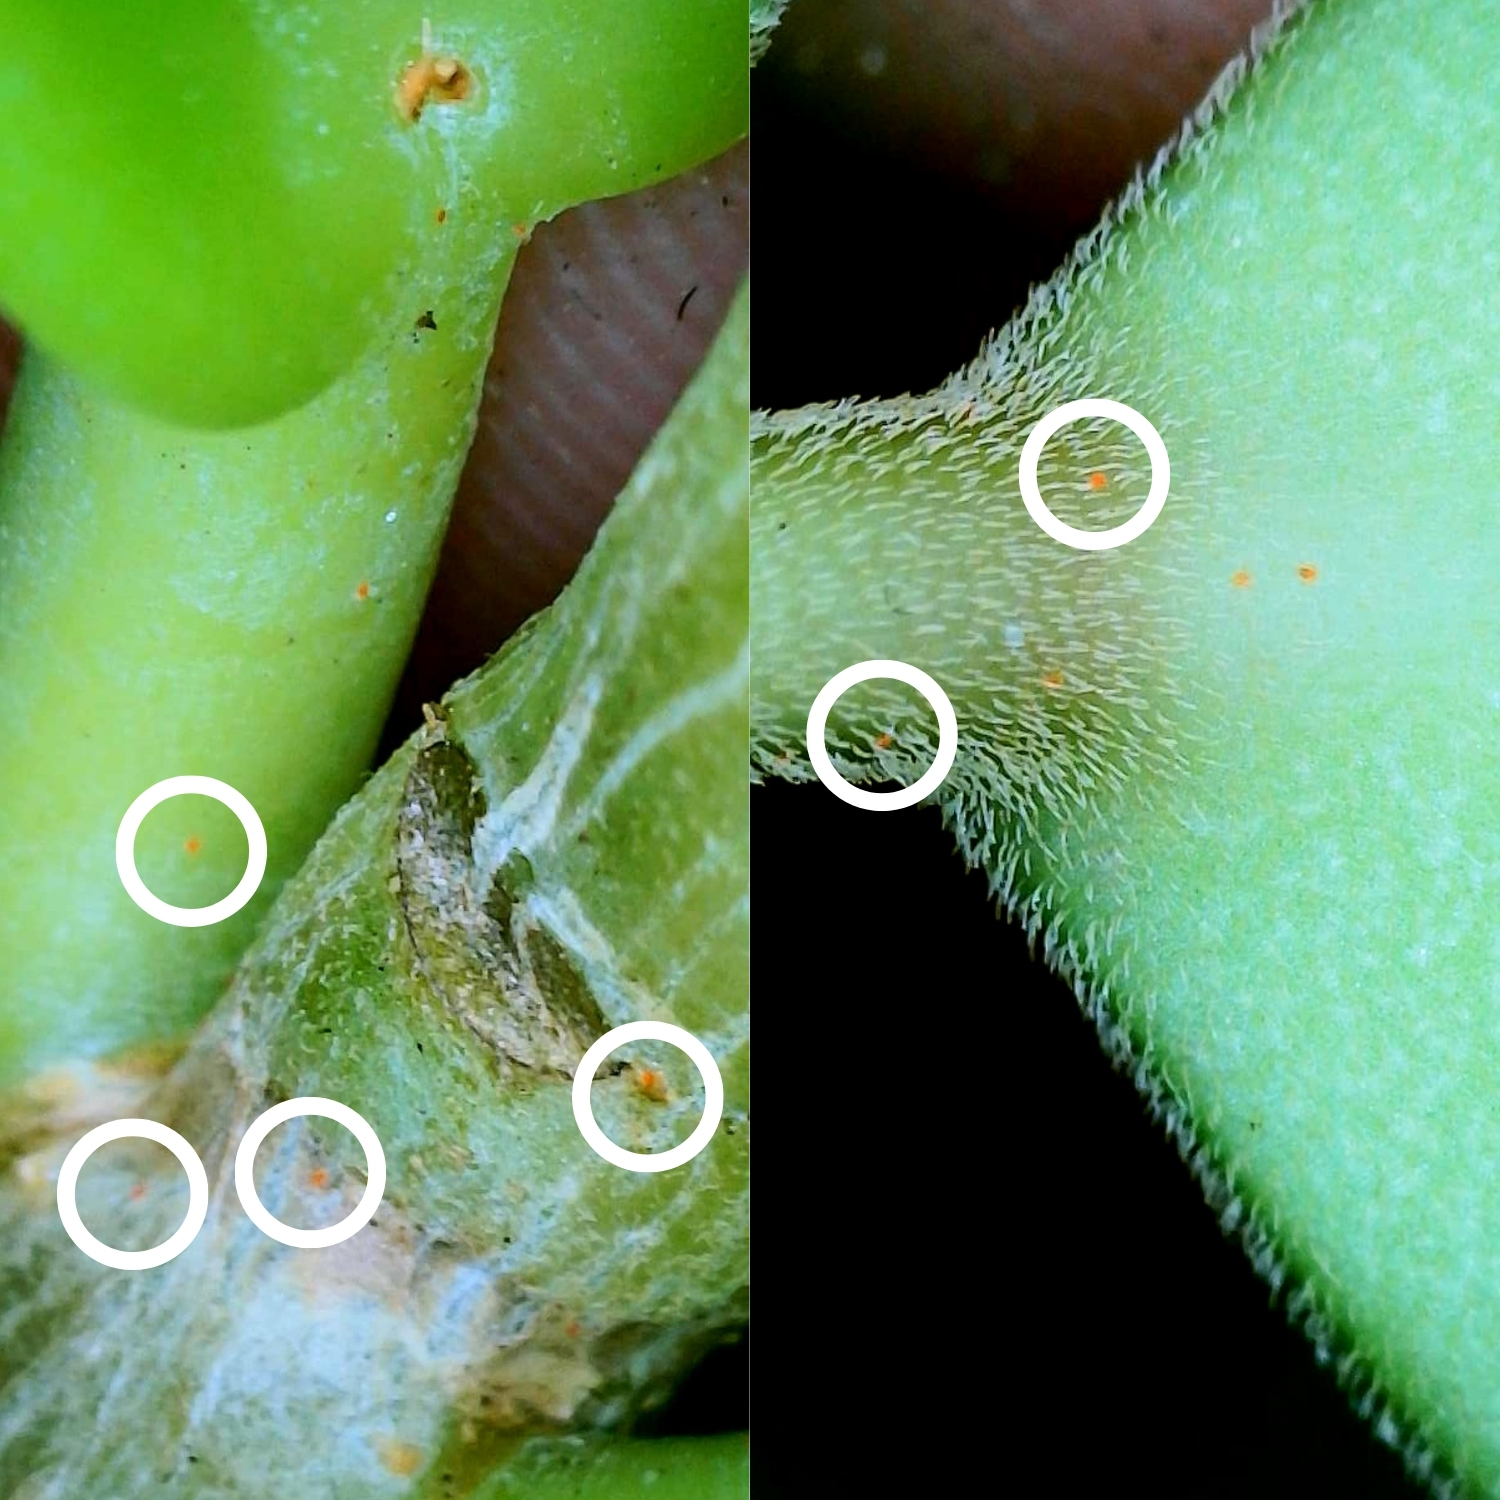
Flat mites are microscopic, so you aren’t able to see them without a microscope. Flat mites have a signature orange/yellow color. Their bodies are somewhat translucent with an orange center. In addition to the orange color, they can also have some black or dark tints, depending on their sex, life stage, and species.
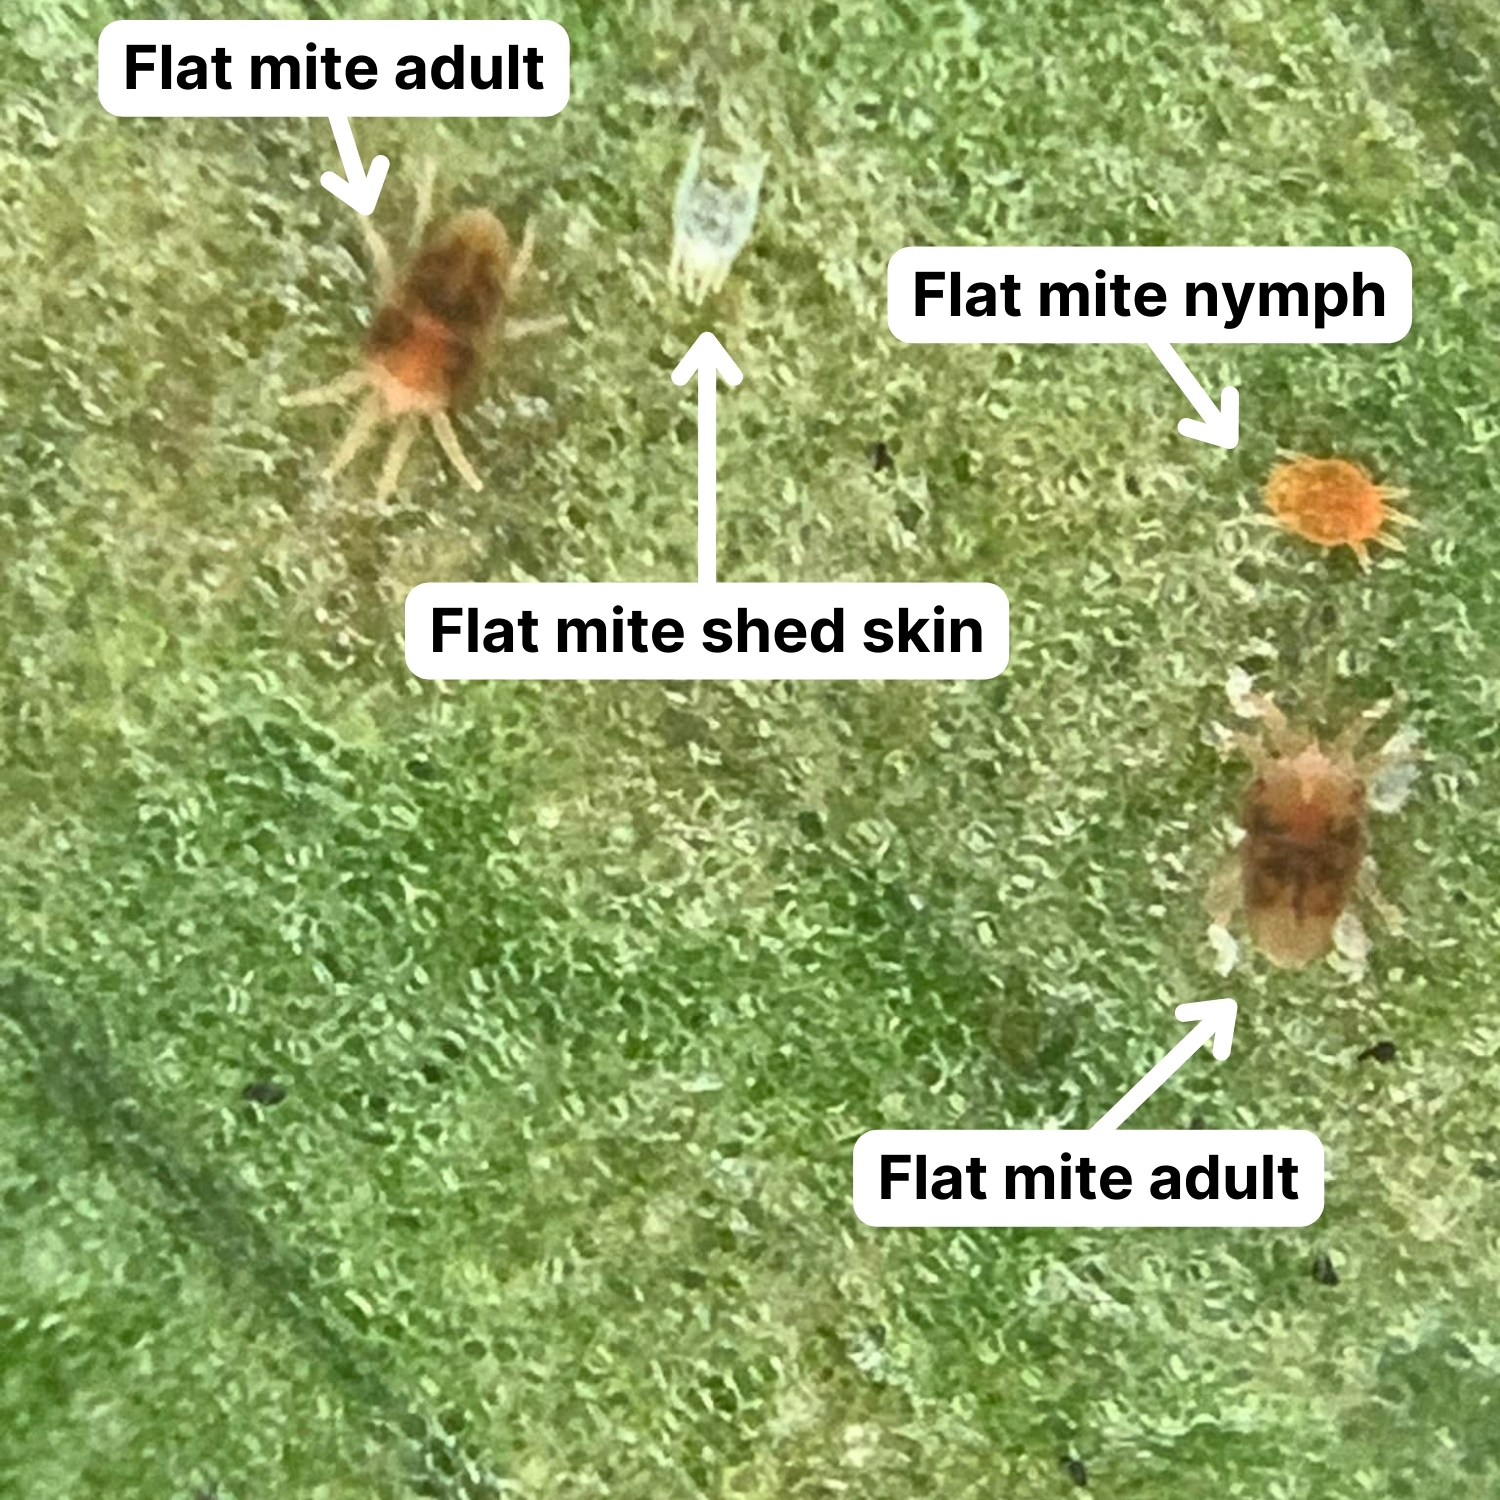

The eggs are tiny, bright orange dots. The eggs are sticky, which is why manual removal and rinsing down plants plays such a large part in getting rid of them.
Inspecting for Flat Mites
Because flat mites are microscopic, to confirm their presence, you’ll need a digital microscope or jeweler’s loupe that can magnify at least 50x.
If you don’t have a microscope, you’ll have to rely on the types of damage that are typical of flat mites, including scarring on leaves and stems, corking or hardening of petioles, and new growth dying off. You’ll often find the eggs clustered around the midrib of leaves and on the petiole.
Unlike pests like spider mites and thrips, flat mites don’t always spread throughout neighboring plants. In fact, it’s not uncommon for them to choose a single plant in a given area and only congregate on that one, despite neighboring plants being close by. Flat mites also seem to prefer specific types of plants, including Hoyas and Marantas, though they can be present on any type.
Examples of Flat Mite Damage
It’s easy for flat mite damage to go unnoticed. Your first sign will not always be visible damage, but rather that a plant whose growth has slowed or stalled—which can especially be difficult to notice in plants that are already known to be slow-growing. There may be a well-established population of flat mites on your plant before damage is noticeable.
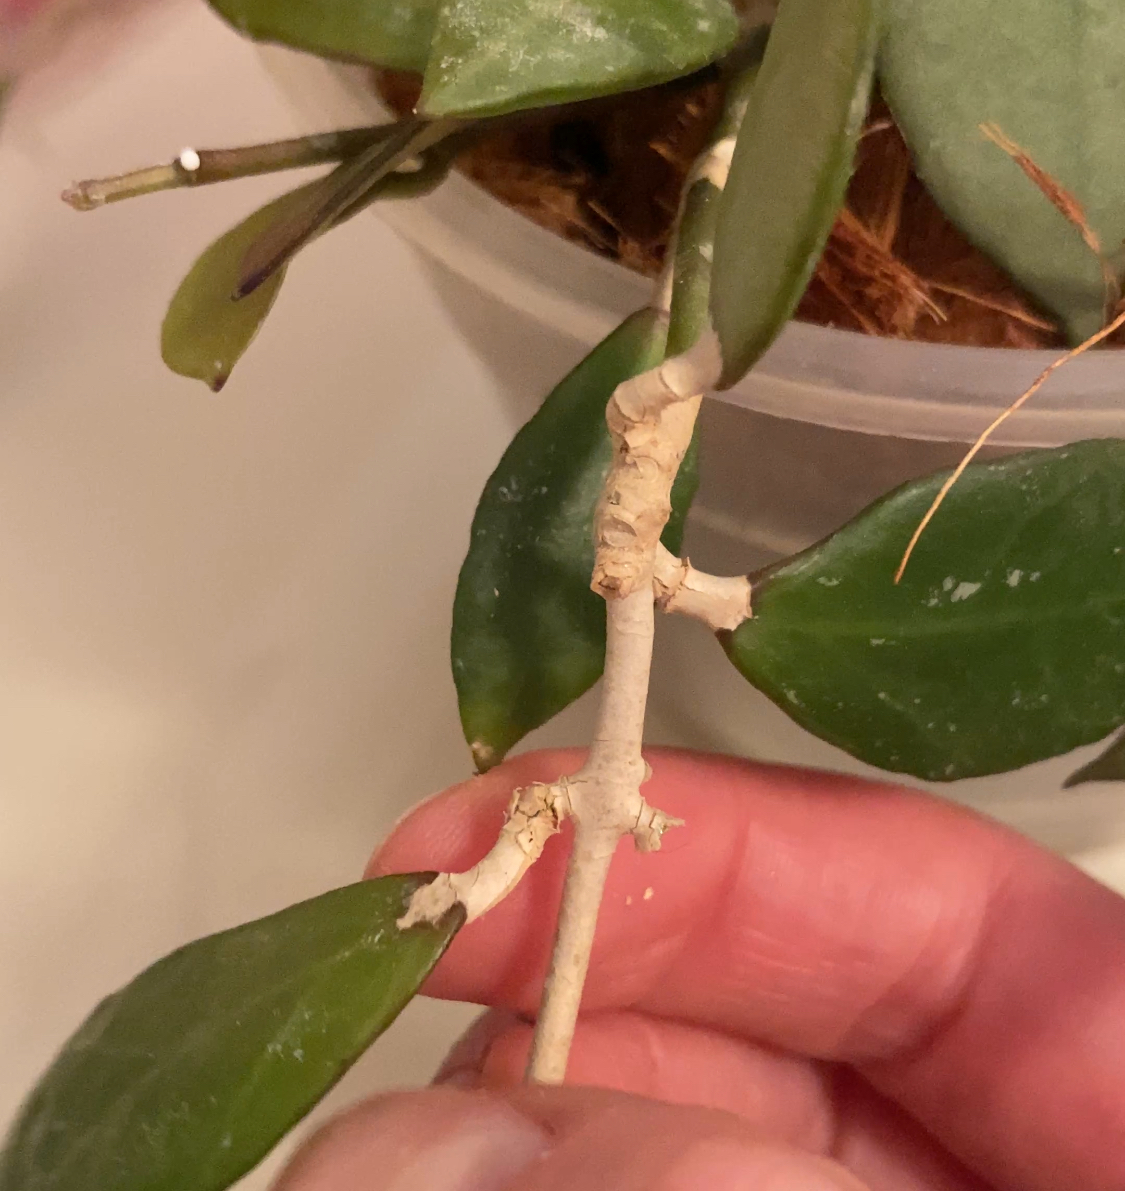
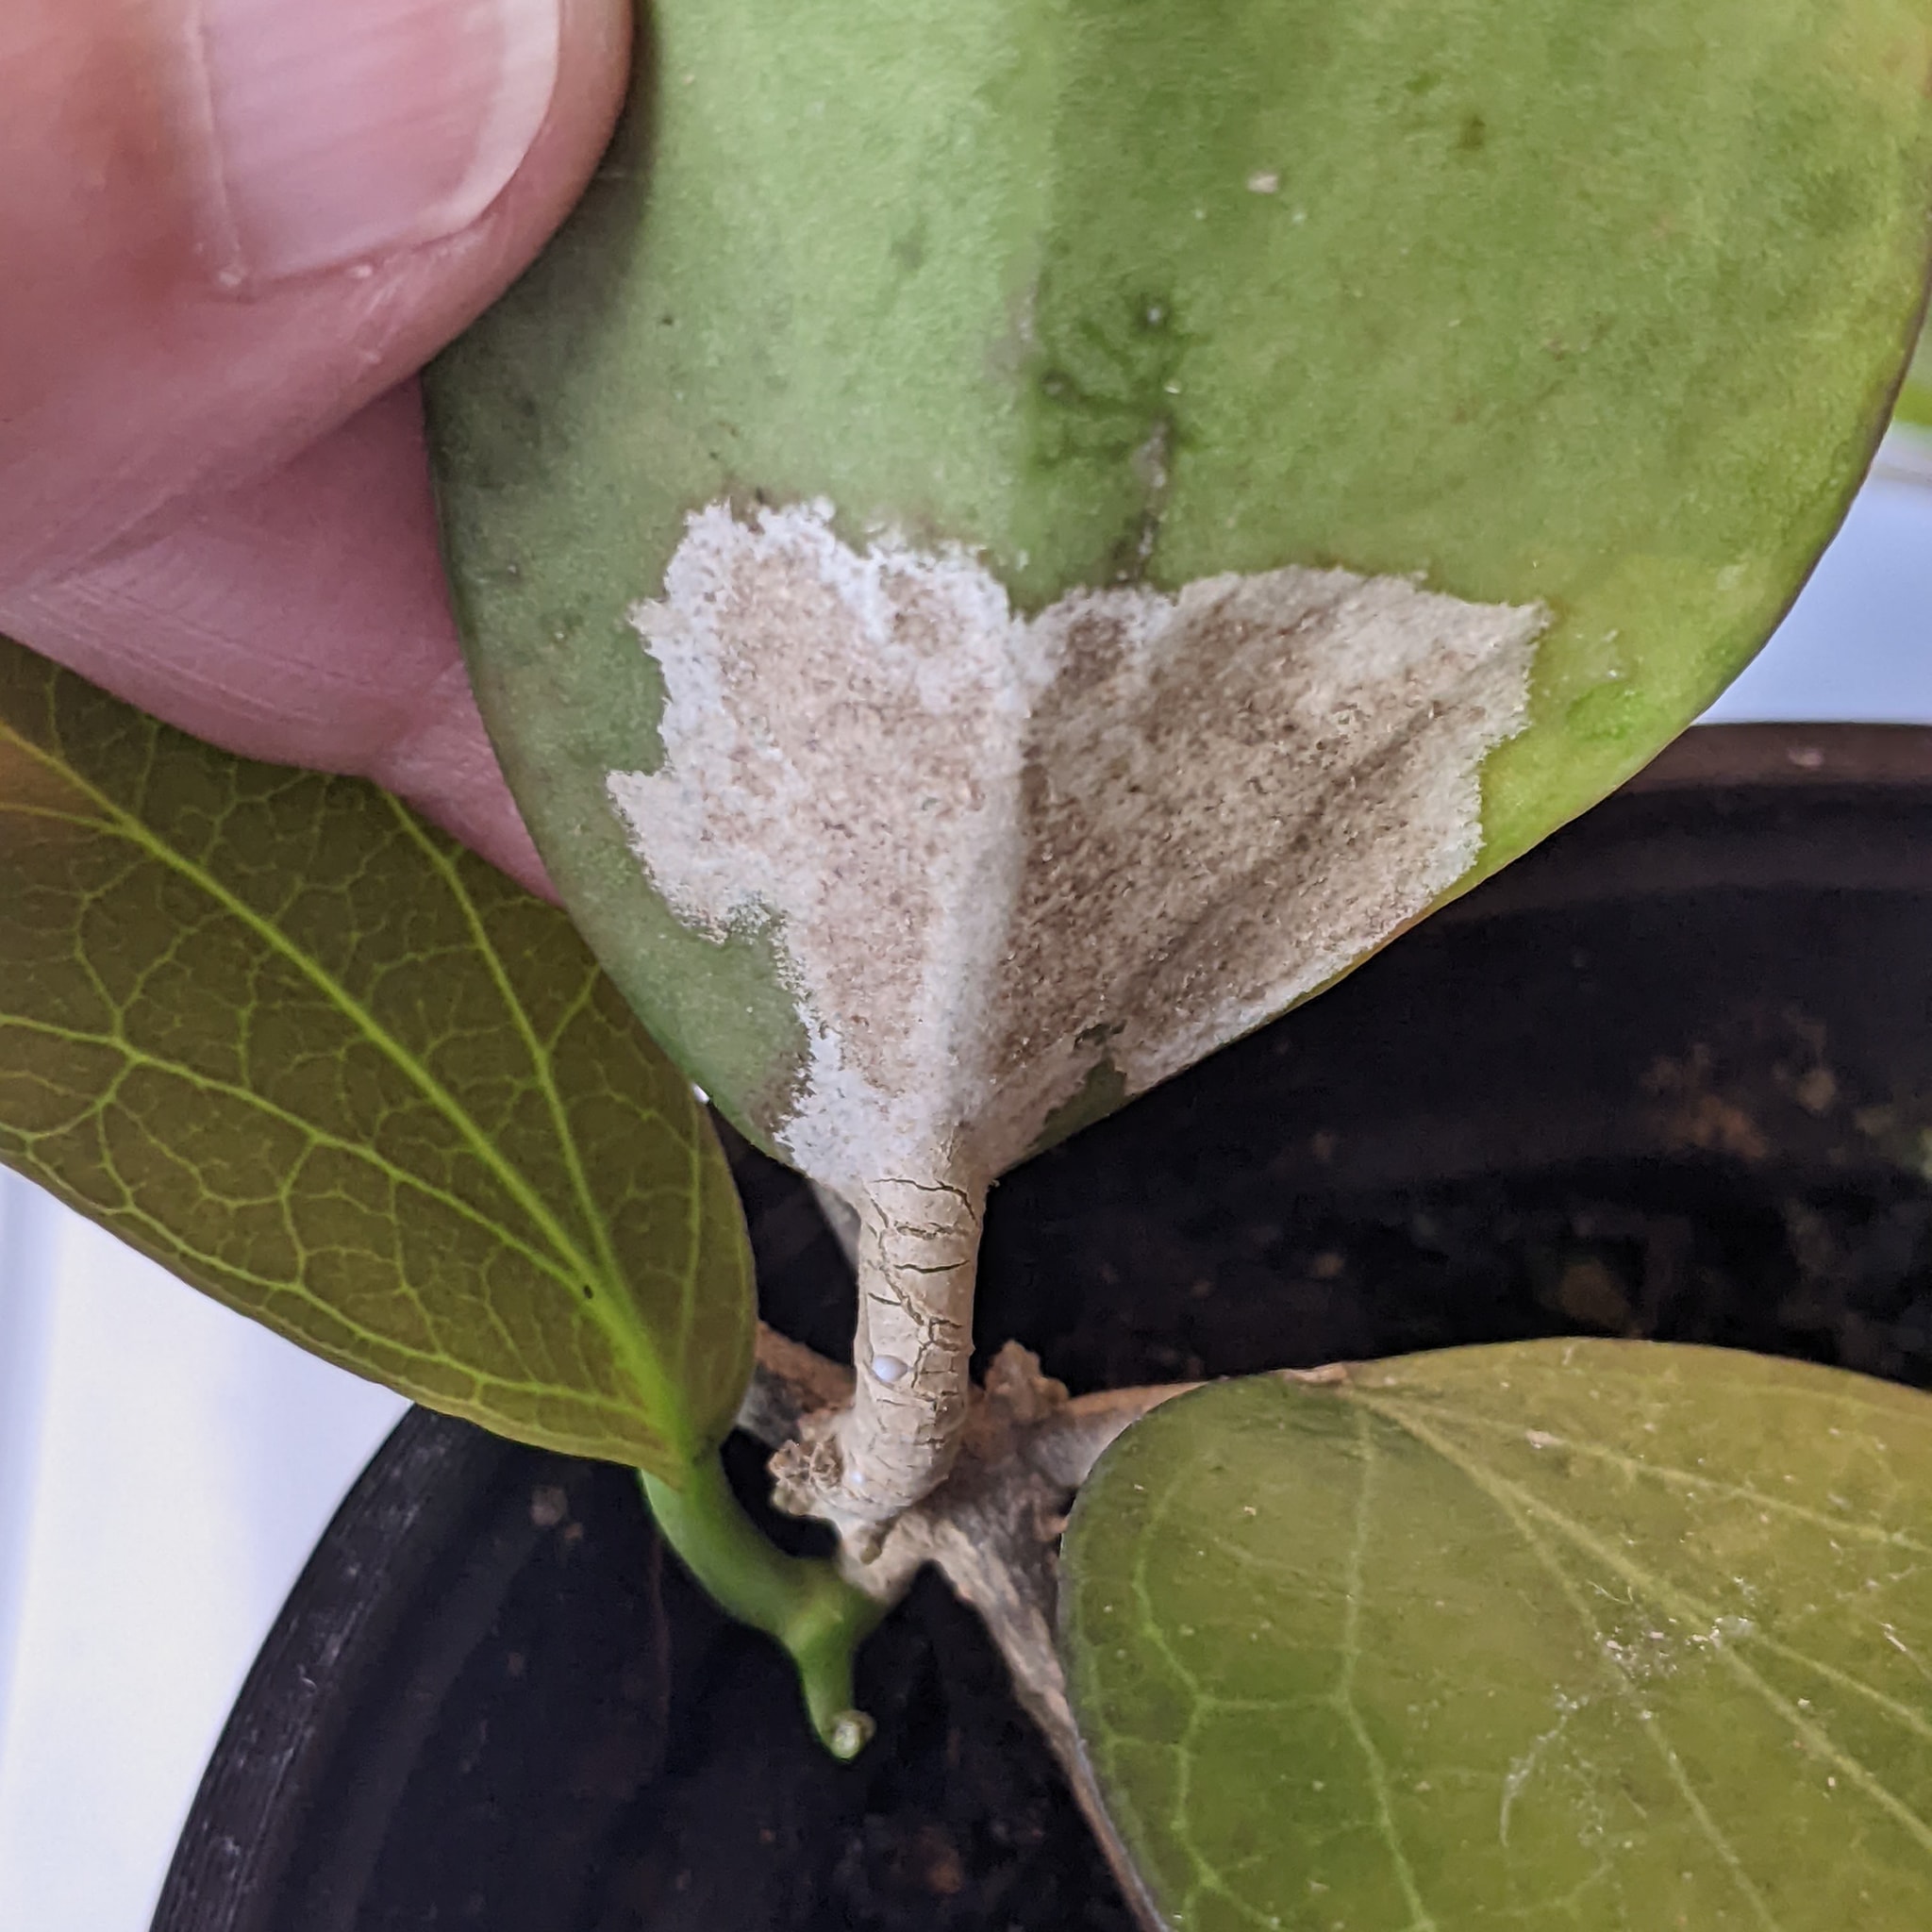
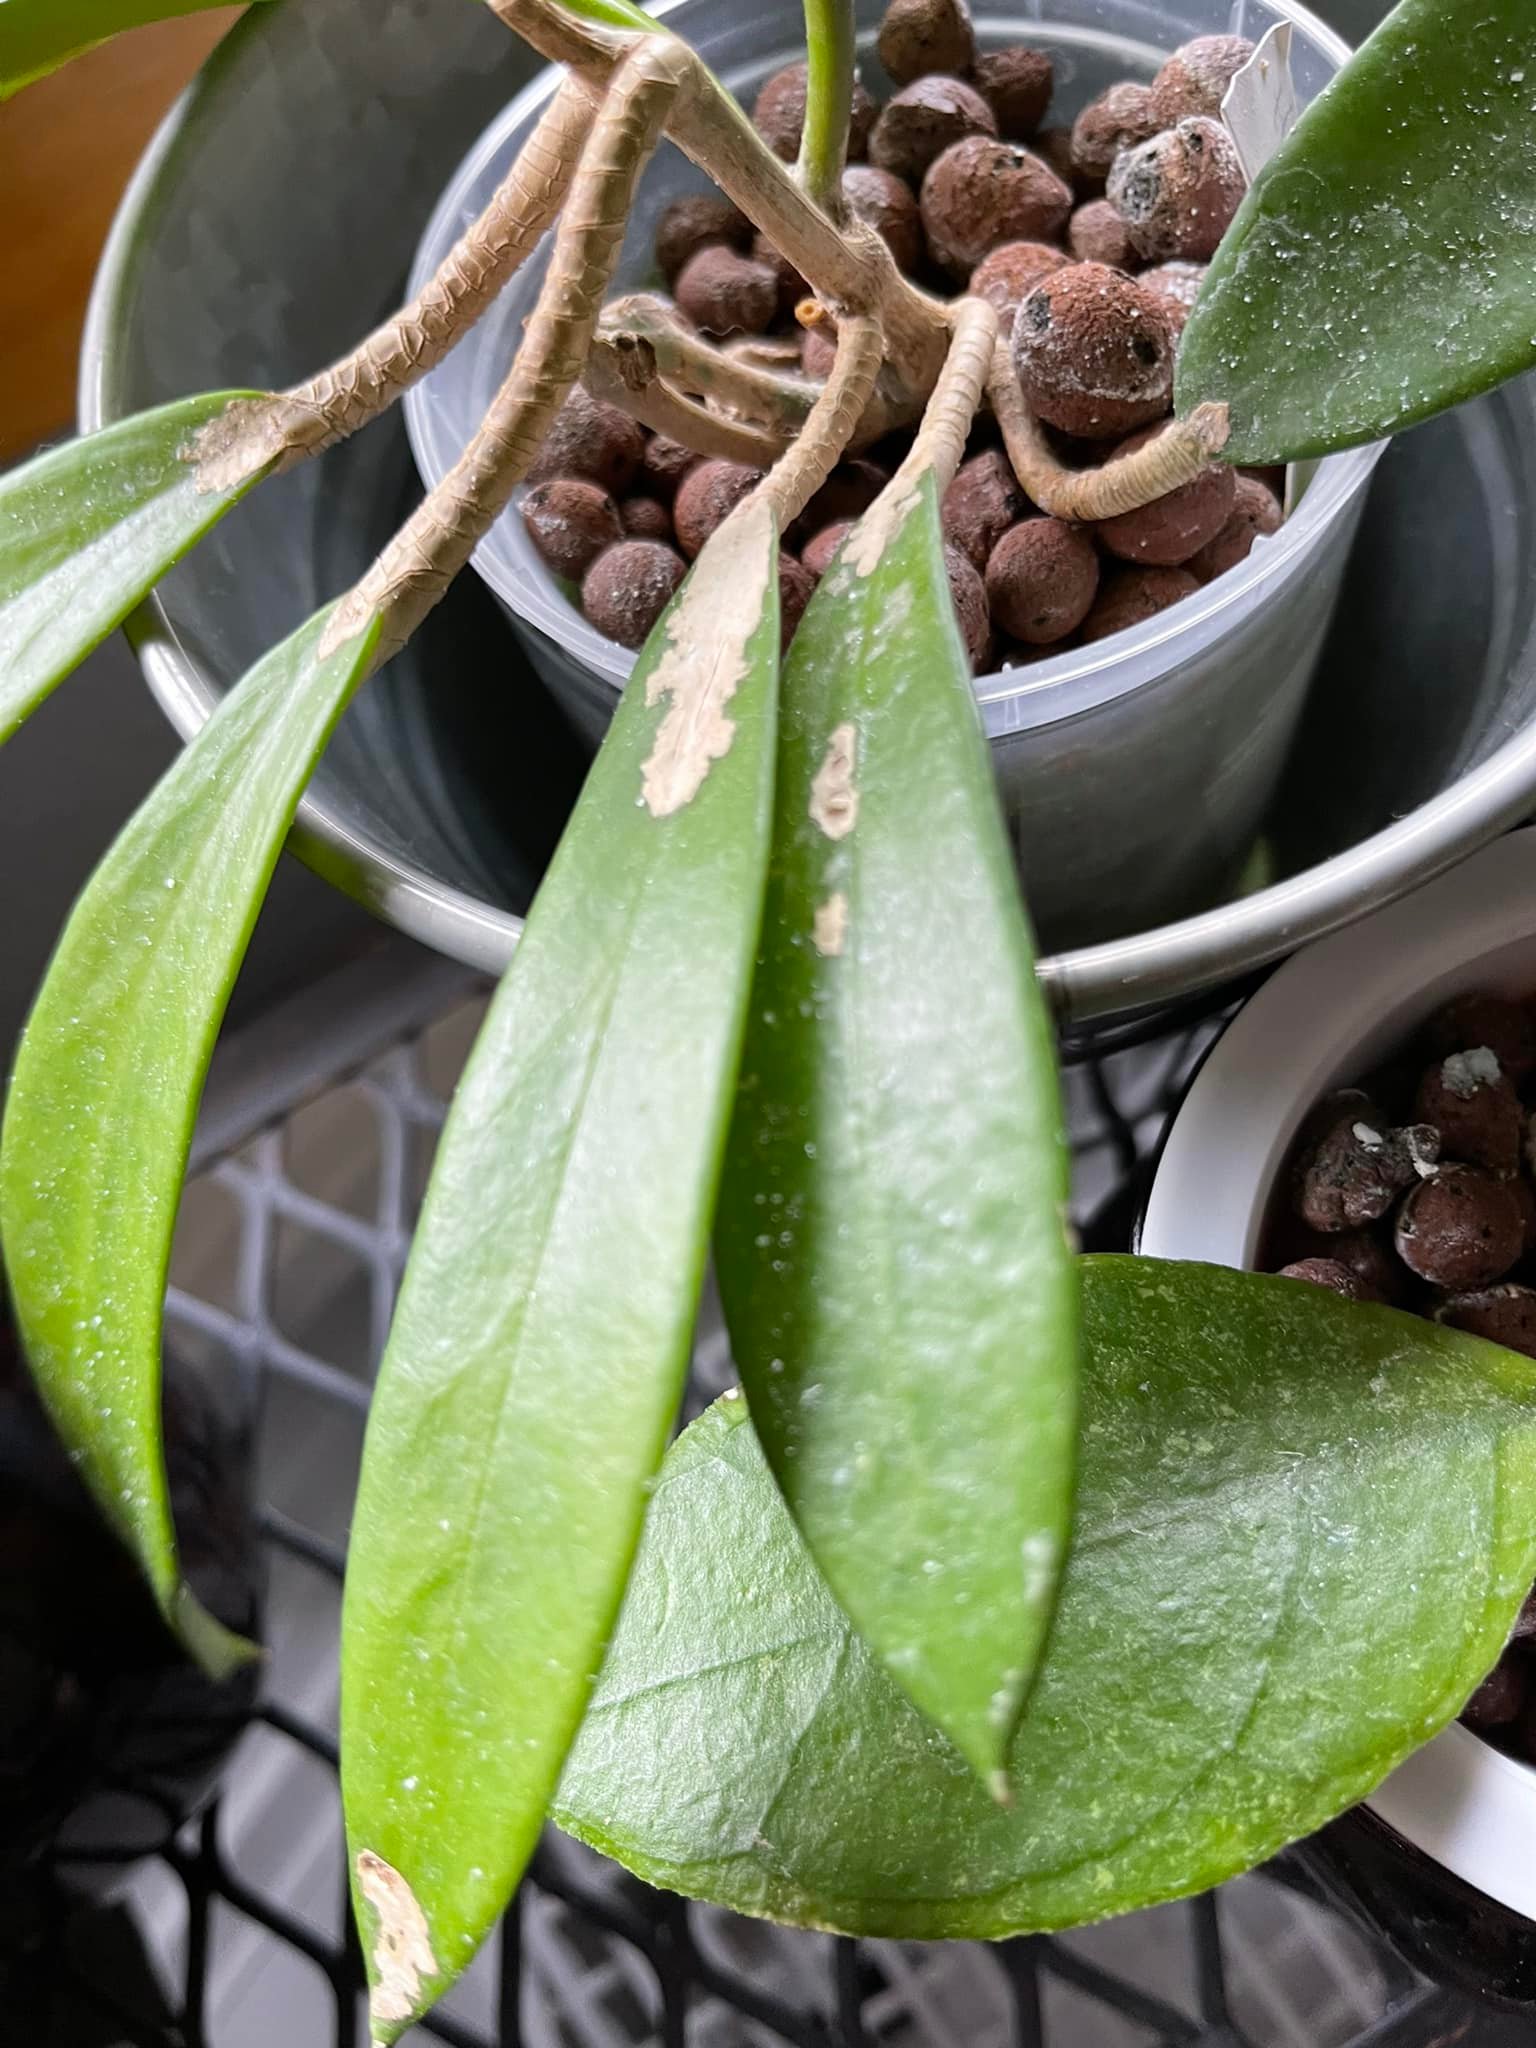
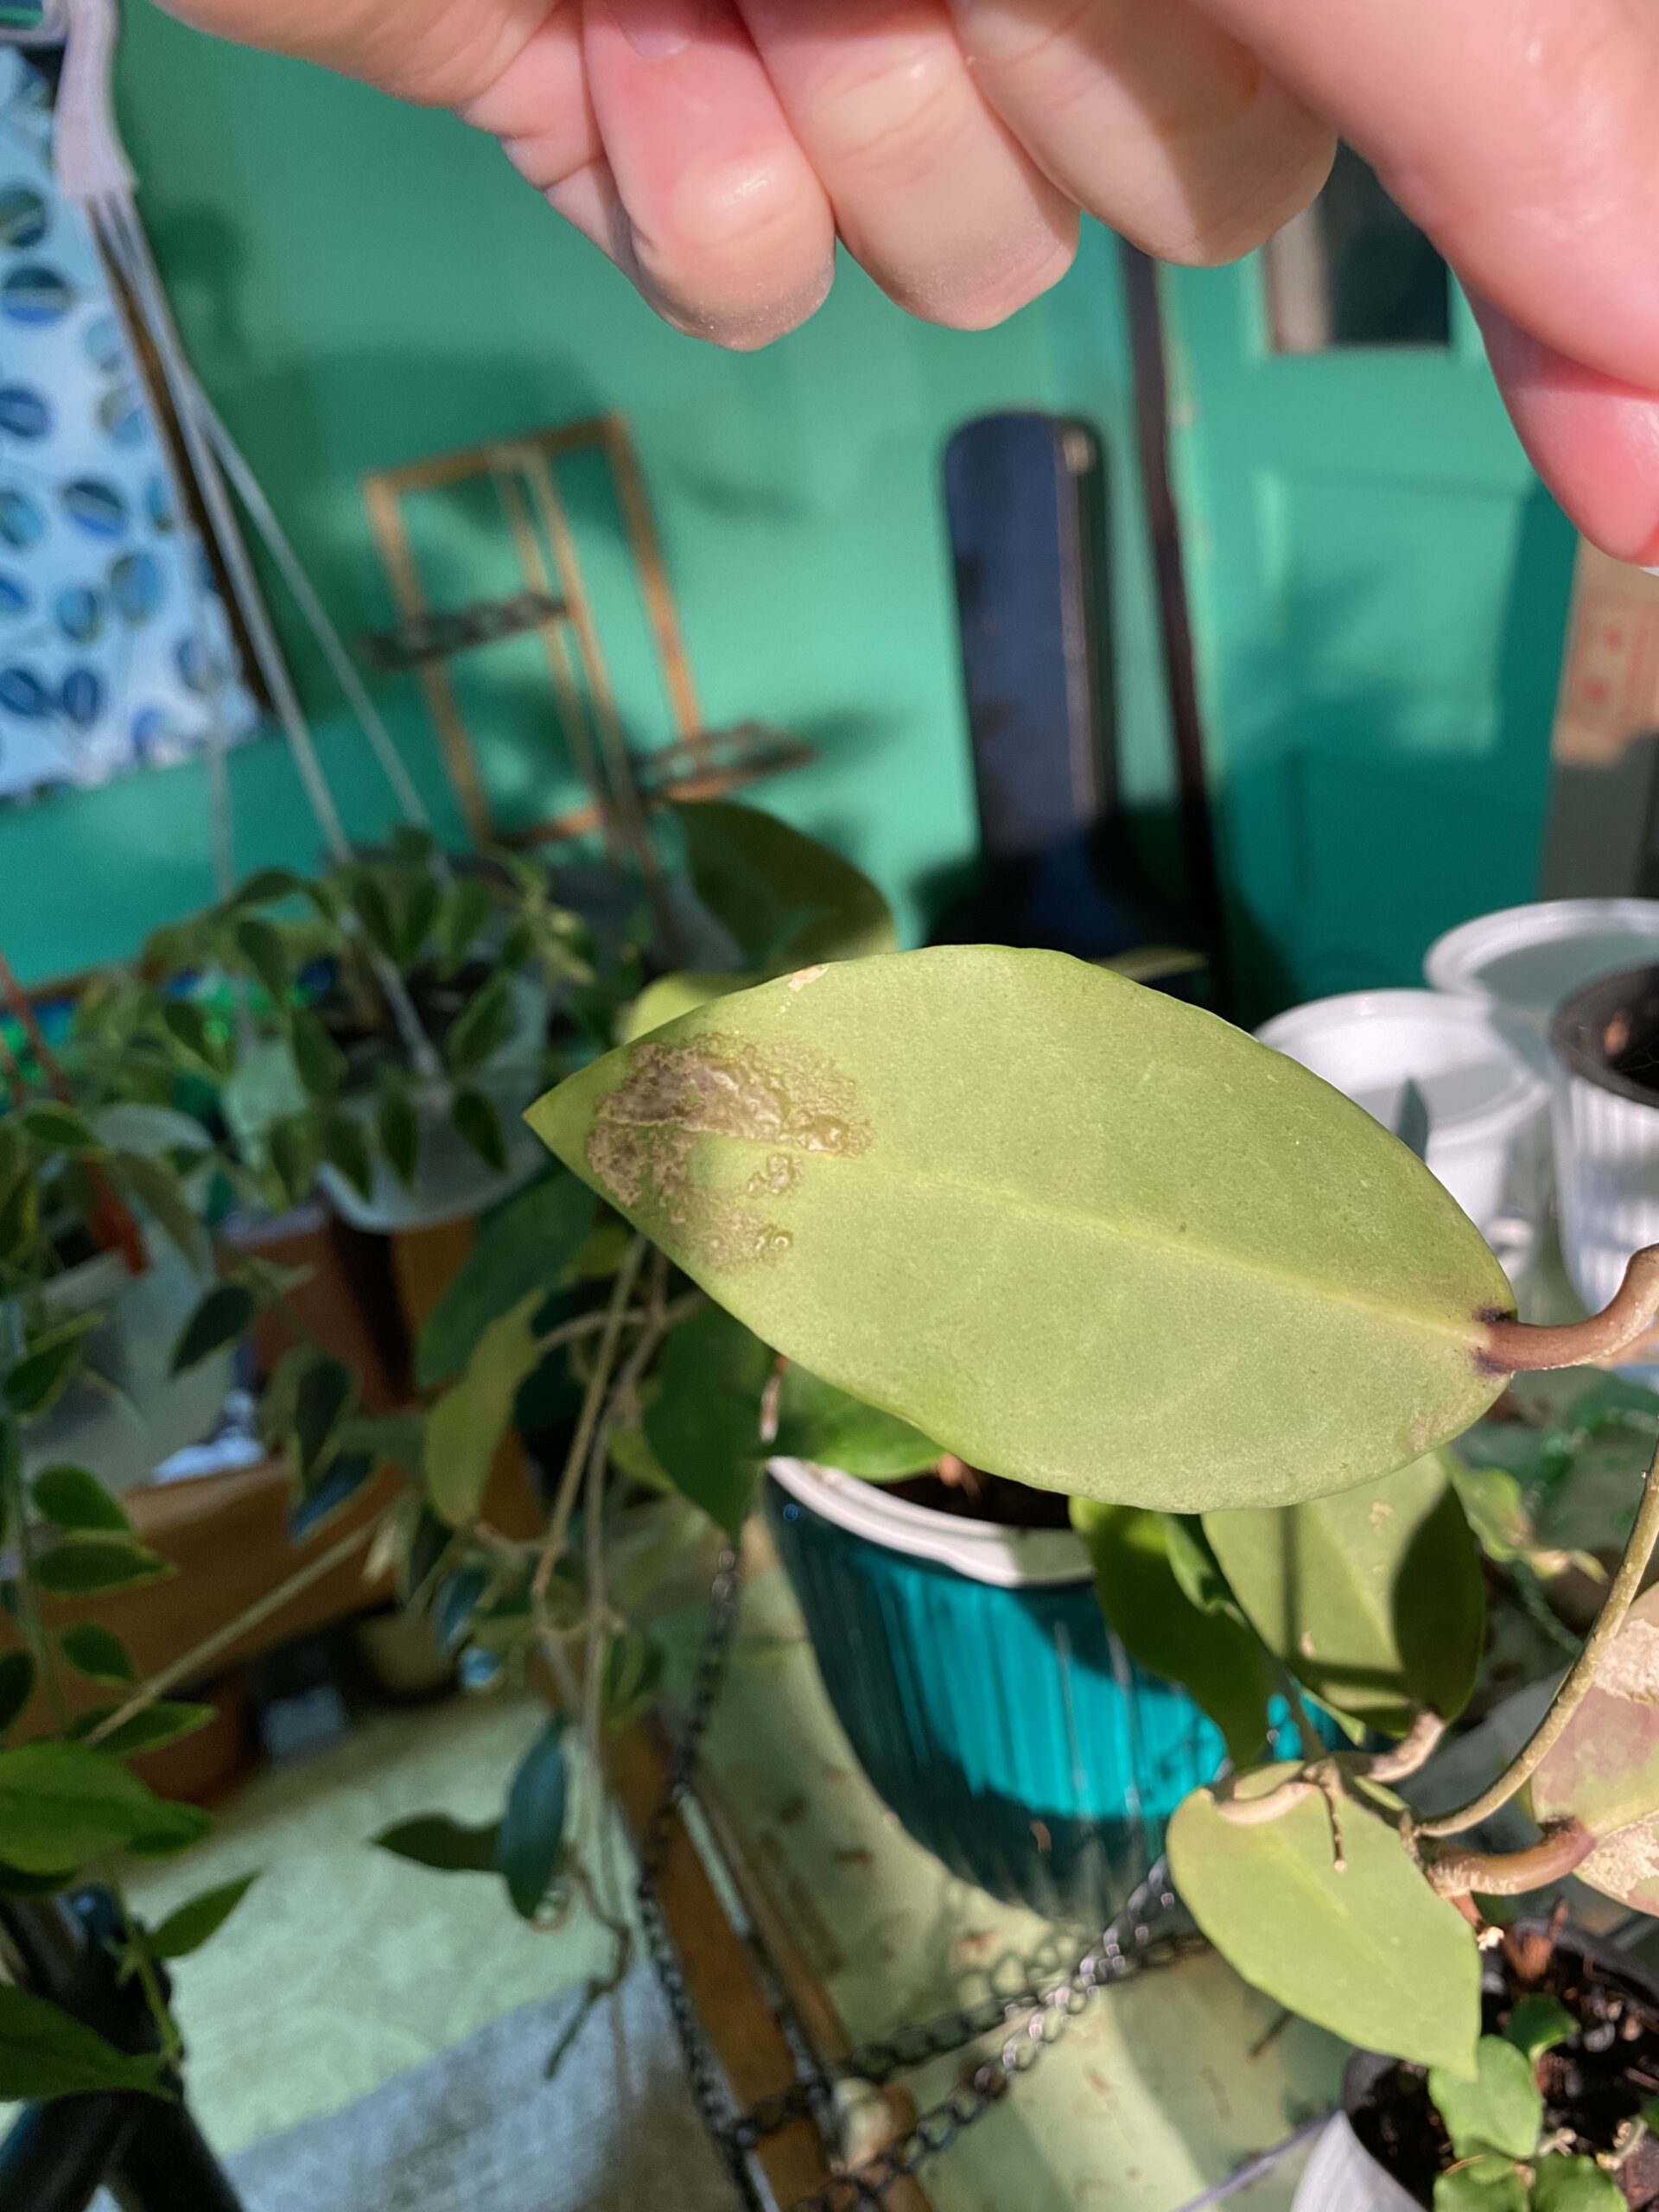
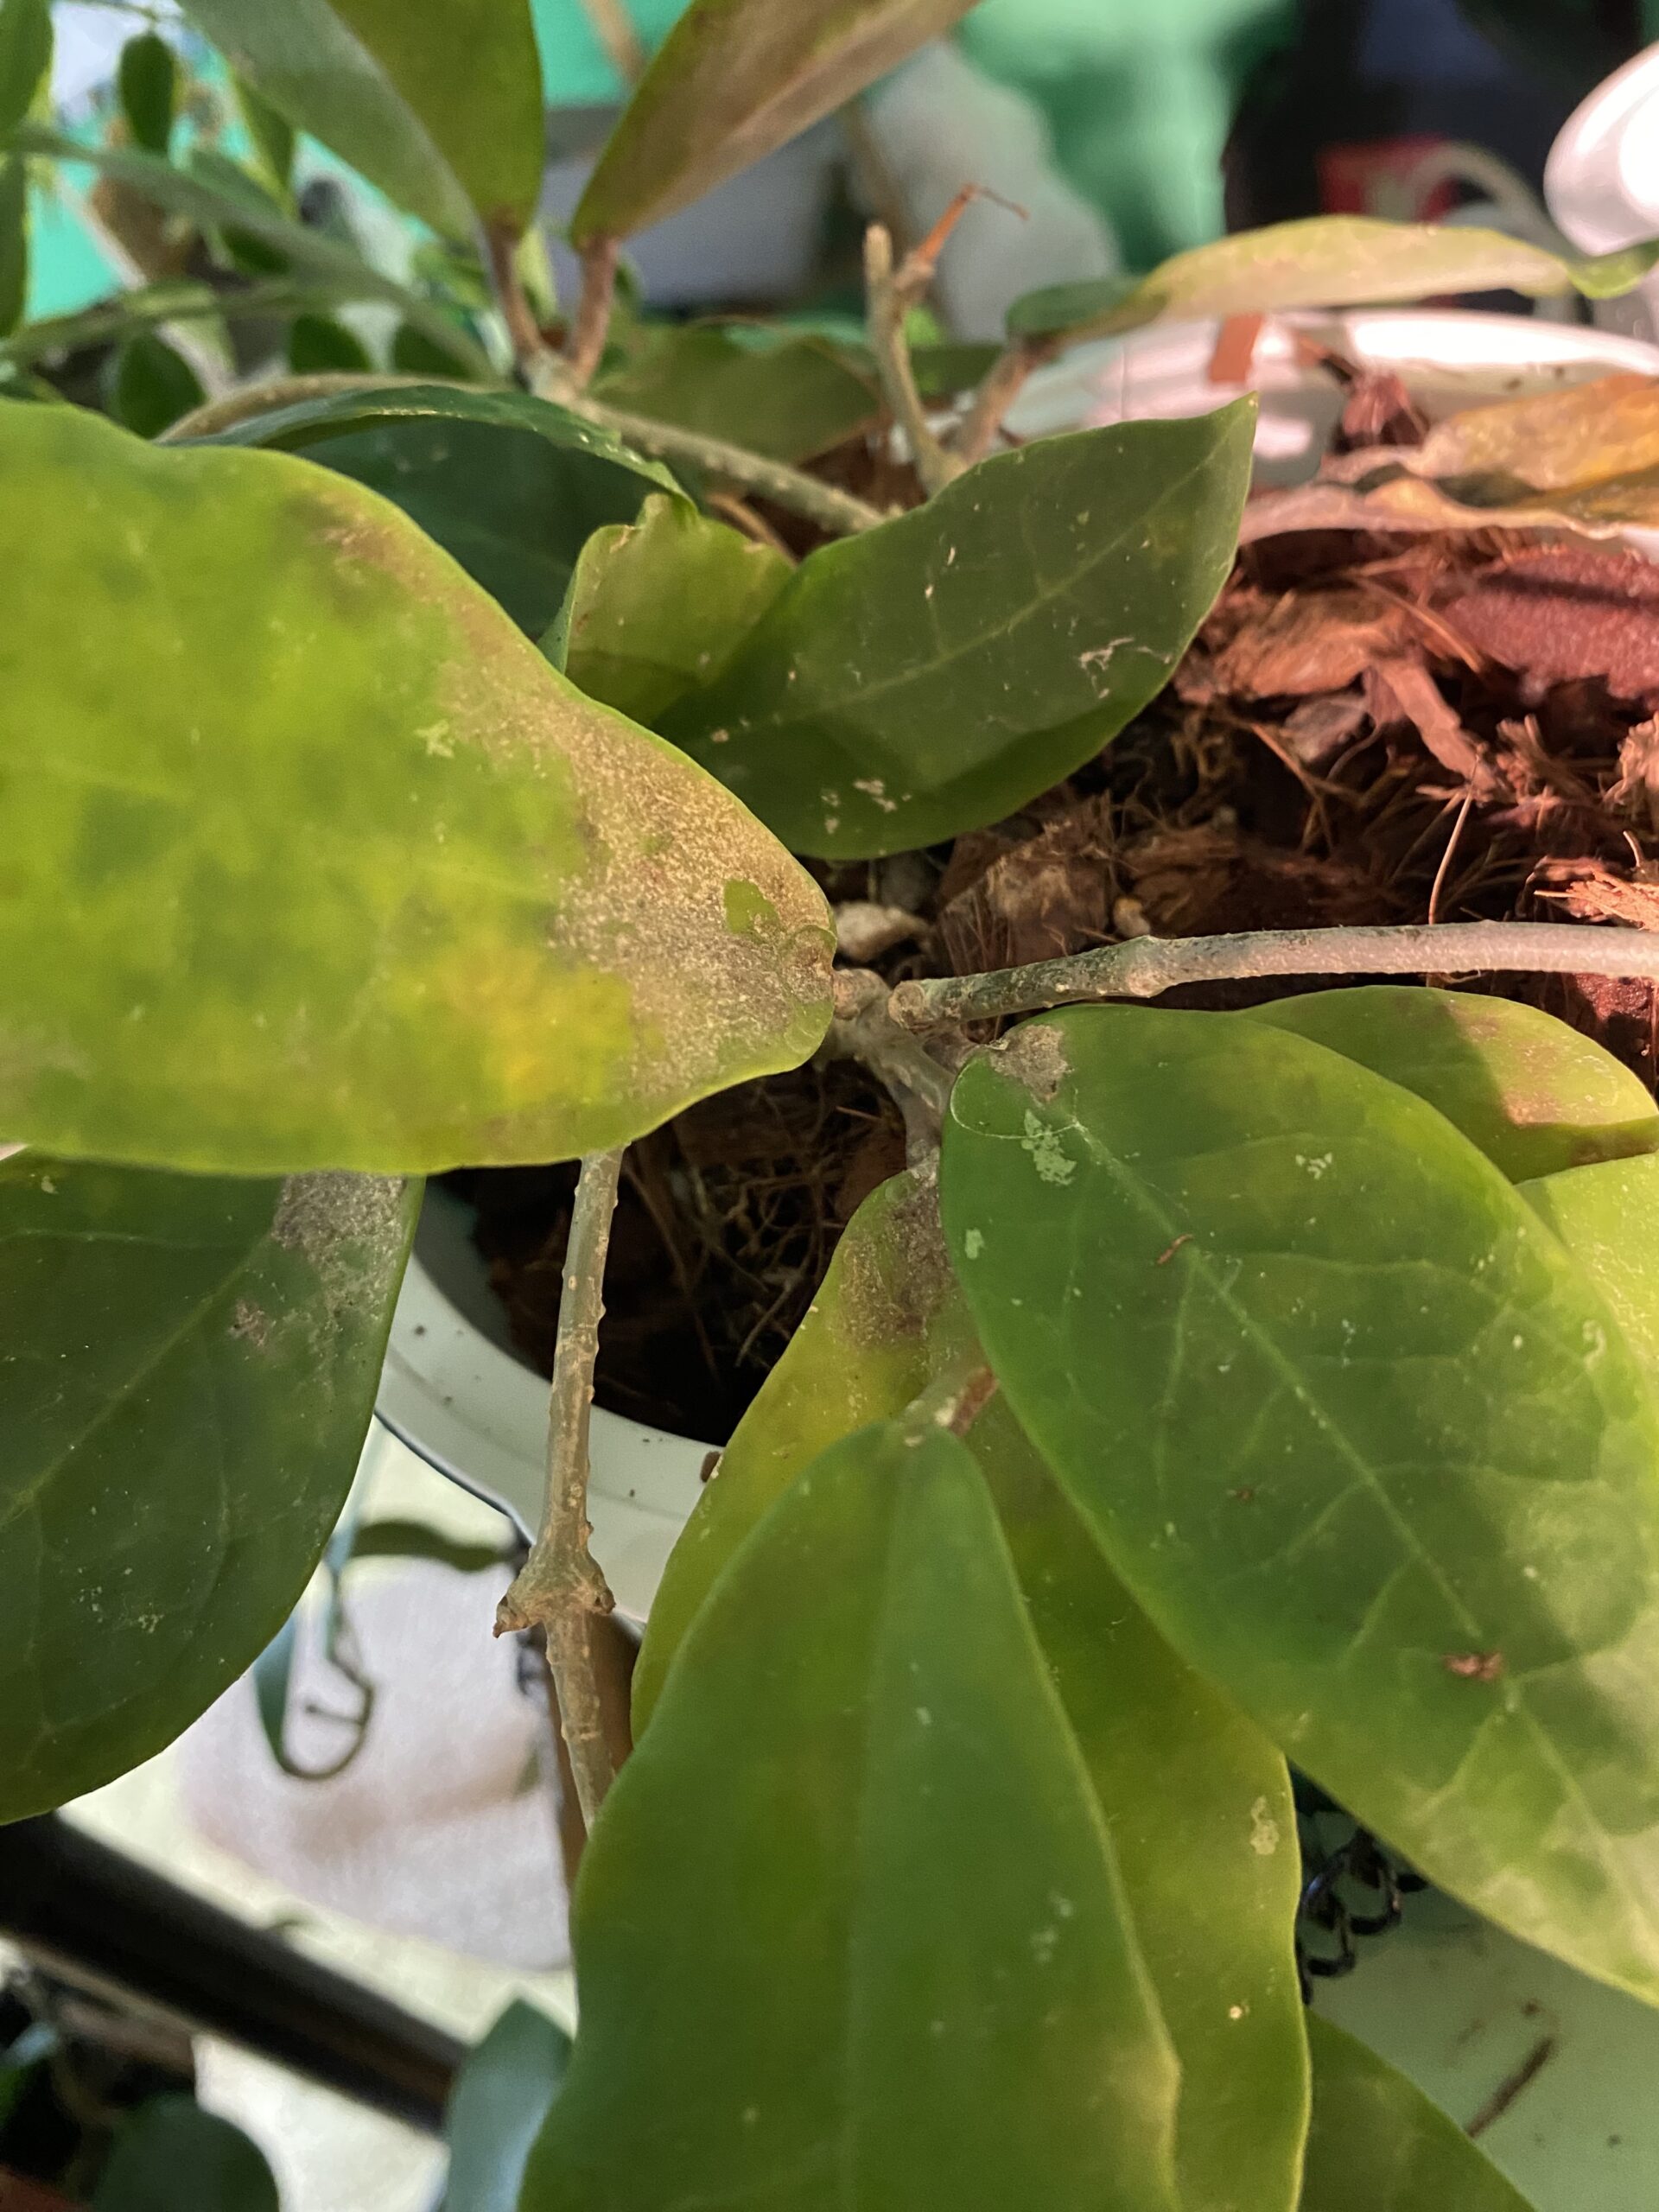
Flat mites tend to feed on the undersides of leaves, so damage often presents as scabbing or browning on the leaf underside, especially around the base and petiole. You may also notice scabbing or corking around the petiole, which can make leaves more fragile and susceptible to falling off. Leaves may also appear deflated, as if the plant is underwatered.
On Hoya, signs of flat mites include the ends of vines or new leaves dying off. You may also notice the vines themselves looking dried out or hardened—this is normal for older growth as it matures, but not so much for newer vines.
Treating Flat Mites with Beneficial Insects
Because flat mites have a long life cycle—something like only four generations per year—compared to other common pests, a longer, slower treatment process works best to keep populations down.
Treatment Overview
First, check all of your plants to get a sense of the following:
- How many plants do you see flat mites, flat mite eggs, or flat mite damage on?
- How many plants are directly adjacent to plants that you see flat mites, eggs, or damage on?
- How many plants do you have in total?
Note: Due to their microscopic size, we highly recommend using a handheld microscope or jeweler’s loupe to identify the mites and their eggs.
Before Releasing Predators
To start, rinse all of the plants you identify mites or damage on, using just water. We also recommend rinsing any plants immediately adjacent to those, being sure to get the backs of the leaves where the flat mites tend to congregate. Rinsing at least the affected plants as regularly as you can with just water will go a long way.
For plants that can tolerate it, a strong jet of water will help dislodge flat mite eggs, which are sticky. You can also use an extra soft toothbrush or makeup brush dipped in water to gently clean the plant, focusing on the petioles and backs of leaves, where flat mites tend to lay their eggs. Caution: for plants that have delicate or already-very-damaged leaves or petioles, this may cause some loss of leaves. Use your best judgment and be gentle.
Choosing Beneficial Insects
Using beneficials to treat flat mites is straightforward: Californicus mites, with optional soil/substrate support from Stratiolaelaps. An ideal treatment plan involves californicus in both bulk (rapid release) and sachet (long-release).
Release Process and Timeline
- Divide bulk californicus among the affected plants. Place sachets around the rest of your plants.
- Two weeks later, release fresh bulk californicus
- Replace the sachets every 4-6 weeks for 3-4 treatment cycles, or until you are longer seeing any flat mites or eggs under a microscope.
Lower-Budget Option
This is recommended for plant owners who don’t have a local DMVb chapter and don’t have the budget to order beneficials multiple times on your own:
- Increase the frequency of rinsing/wiping your plants down with water.
- Place one large beneficials order of californicus in sachets and Stratiolaelaps (for the soil).
- Periodically spot check plants under a digital microscope and remove any mites or eggs you see.
- Six weeks later, do a full rinse of your affected plants, and repeat the large order of californicus in sachets and Stratiolaelaps.
Flat mites reproduce slowly and won’t kill your plant quickly, so drawing the treatment plan out to fit your budget is totally fine. And we are always happy to consult to make sure it’s budget-friendly and still effective!
Preventative Treatment
If you have a history of flat mites, regularly bring new plants into your home, or grow Hoya, a history of flat mites, replacing californicus sachets every 4-6 weeks is a great way to prevent a resurgence.
If you grow Hoya, californicus sachets should be an essential part of your basic plant care.